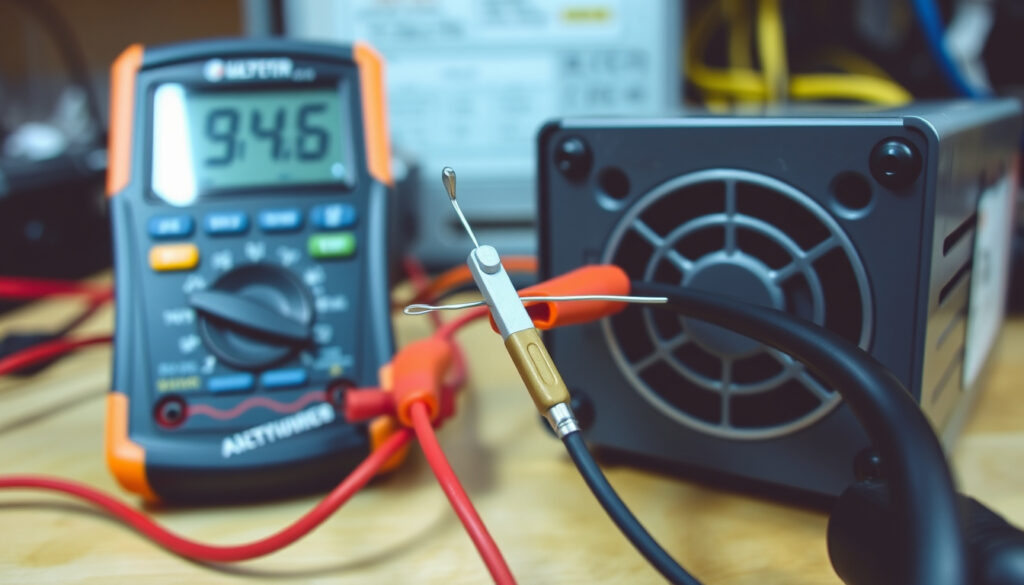
How to Test a Power Supply: Multimeter & Paperclip Guide
Few things are as frustrating as a PC that won’t turn on. You press the power button, nothing happens, and suddenly every component is suspect. Before you replace expensive parts, there’s a smarter move: test the power supply first, using nothing more than a paperclip and a multimeter.
Average PSU lifespan: 5–10 years under normal use ·
Common failure symptoms: Random shutdowns, no power, burning smell ·
Standard voltage tolerances: ±5% for +12V, +5V, +3.3V rails ·
Paperclip test pin numbers: Pin 16 (green) and pin 17 (black) on 24-pin ATX connector
Quick snapshot
- Paperclip test reliably powers on a PSU without a motherboard (Corsair Help Center)
- Multimeter can measure DC voltage output on all rails (How-To Geek)
- Whether a PSU that passes the paperclip test will sustain voltage under real load – further testing needed
- Exact failure rate of PSUs beyond warranty varies by brand and usage patterns
- Software readings (e.g., HWiNFO) are only as accurate as the motherboard’s sensors – no direct source confirmation
- Most PSUs last 5–10 years; voltage drift often begins after year 7 (O’Reilly Media)
- Combine paperclip, multimeter, and software testing for a definitive diagnosis
These are the critical specifications you need to know before testing your PSU.
| Key fact | Value |
|---|---|
| ATX connector pins | 24 pins (20+4 on older units) |
| Key voltage rails | +12V, +5V, +3.3V, -12V, +5VSB |
| Paperclip test pins | Pin 16 (green) and pin 17 (black) |
| Tolerance range | ±5% for all main rails |
| Efficiency standard | 80 Plus (Bronze, Silver, Gold, Platinum, Titanium) |
How can I test if my power supply is bad?
Signs of a failing PSU
Your PSU might be the culprit if your PC suffers random shutdowns, refuses to boot, emits a burning smell, or produces noticeable coil whine. These symptoms point directly to PSU failure, according to Corsair’s support documentation.
When to suspect the power supply
If the PC shows no signs of life at all, the PSU should be your first suspect. A dead PSU usually means no fan spin and no power to peripherals like mouse or keyboard LEDs. Random restarts under CPU or GPU load also suggest the +12V rail may be dropping below tolerance.
- Check for bulging capacitors or burnt connectors during visual inspection
- Listen for a high-pitched whine that stops when the system is powered off
Quick visual inspection tips
Before reaching for tools, open the case and inspect the PSU’s fan intakes and exhaust. Debris blocking airflow can cause overheating and premature failure. Look at the 24-pin connector for melted or discolored plastic — a sign of a poor connection that generates heat under load.
A visual inspection catches about 20% of PSU failures before any electrical testing. If you see a burnt connector, stop immediately — the PSU must be replaced, not tested further.
The implication: visual inspection is a fast, zero-cost first pass that can save you from unnecessary electrical testing.
How to check power supply with a multimeter?
Setting up the multimeter
Set your multimeter to DC voltage mode with a 20V range. The black probe goes to ground — use any black wire on the 24-pin connector or a screw on the case. The black lead should stay on ground while the red probe is moved to each rail pin.
Measuring the +12V, +5V, and +3.3V rails
With the PSU powered on (after the paperclip trick), probe the following pins with the red lead:
- +12V rail: Pin 10 (yellow wire) on the 24-pin connector
- +5V rail: Pin 9 (red wire)
- +3.3V rail: Pin 1 (orange wire)
- +5VSB standby: Pin 9 (purple wire) — should show power even before the paperclip jump
Intel’s ATX specification defines these as the standardized measurement points across all desktop power supplies.
Interpreting voltage readings
ATX tolerance values are clear: +3.3V may vary ±4%, +5V ±5%, +12V ±5%, and -12V ±10%, per the official O’Reilly reference on ATX specifications. Readings outside these windows indicate a failing PSU.
- A +12V rail reading 11.4V or lower is out of tolerance
- A +5V rail reading below 4.75V indicates degradation
- The +12V rail is the most critical for modern CPUs and GPUs
A multimeter gives you exact voltages but requires the paperclip trick to power the PSU first. You’re getting precision at the cost of an extra step — one that’s worth the effort when your PC won’t boot.
The pattern: multimeter testing is the gold standard for accuracy, but it demands a methodical approach and the right reference points.
How to test a power supply without a motherboard?
The paperclip method
Disconnect the PSU from all components except the AC cord and the 24-pin ATX cable. Locate pin 16 (green wire — PS_ON) and pin 17 (black wire — ground) on the 24-pin connector. Insert a paperclip or PSU jumper into both pins. The fan should spin continuously if the unit is functional.
How-To Geek notes that you can also jump pin 16 to pin 15 (also ground) — both work because PS_ON simply needs a path to ground.
Using a dedicated PSU tester
A dedicated PSU tester plugs directly into the 24-pin connector and shows a digital readout for each rail. These cost between $10 and $30 and provide an immediate pass/fail verdict. They’re especially useful if you’re uncomfortable handling live wires with a multimeter.
Safety precautions
Never open the PSU enclosure itself — the capacitors inside can hold a dangerous charge for months. Work only with the external cables and connectors. The paperclip test should only be performed with the PSU unplugged from AC power while you insert the jumper.
The paperclip test proves the PSU turns on — that’s it. It does not confirm that voltages are correct. A PSU can spin its fan and still deliver +12V at only 10.5V, which will damage components under load.
What this means: the paperclip test is a necessary first step but never a substitute for voltage measurement.
What is the paperclip test for power supply?
Which pins to jump
On the 24-pin ATX connector, pin 16 is the PS_ON signal (green wire) and pin 17 is the adjacent ground (black wire). The O’Reilly ATX reference confirms this is the standardized method used across all ATX-compatible PSUs.
Step-by-step procedure
- Shut off the PSU and unplug the AC cord
- Disconnect all cables from the motherboard and drives
- Straighten a paperclip to form a U shape
- Insert one end into pin 16 (green) and the other into pin 17 (black)
- Plug the AC cord back in and switch the PSU on
- Observe whether the fan spins continuously
What the test confirms and what it doesn’t
A spinning fan confirms the PSU’s internal power-on circuit works and the +12V standby rail is delivering power. But it doesn’t test the rails under load or verify voltage accuracy. No-load paperclip testing alone does not verify that a PSU can sustain voltage under real load — that’s why a multimeter rail check is far more informative.
The catch: without voltage verification, a spinning fan can give false confidence that leads to component damage under load.
What is the lifespan of a PC power supply?
Factors that affect PSU lifespan
Most PSUs last 5–10 years under normal loads, according to industry standards. Heat is the primary enemy — every 10°C increase above 25°C reportedly halves electrolytic capacitor life. Dust buildup on fan intakes accelerates this by reducing cooling efficiency. Power surges from unstable household voltage also stress the PSU’s protection circuits.
When to replace a PSU
Replacement is recommended after 7 years or if voltage tolerances drift beyond the ±5% threshold. Signs of age-related degradation include fan bearing noise, slow fan startup, and progressively lower voltage readings during multimeter tests. The Intel ATX specification provides the baseline tolerance values that your PSU should still meet at 7+ years.
Signs of age-related degradation
- Voltage readings that are consistently near the low end of tolerance
- Fan that rattles or stops spinning intermittently
- Crackling sound from the PSU when under load
- Visible capacitor bulging through the exhaust grille
If your PSU is past its 7th birthday and you notice any of the above, replace it proactively. A failing PSU can damage a motherboard, GPU, or entire storage array — the cost of replacement is far lower than the cost of lost components or data.
The pattern: PSU aging is predictable, and proactive replacement at the 7-year mark eliminates the risk of cascading hardware failure.
Confirmed facts
- Paperclip test reliably powers on a PSU without a motherboard — confirmed by Corsair Help Center
- Multimeter can measure DC voltage output on all rails — verified by How-To Geek
- ATX tolerance: +3.3V ±4%, +5V ±5%, +12V ±5% — per O’Reilly Media
What’s unclear
- Whether a PSU that passes the paperclip test will sustain voltage under real load — further multimeter or load testing is needed
- Exact failure rate of PSUs beyond warranty varies by brand and usage intensity
- Software readings (e.g., HWiNFO) are only as accurate as the motherboard’s sensors — no direct source confirmation
Quotes from experts
“Shut off your PSU. Unplug all cables except the 24‑pin. Locate pin 16 and pin 17 on the 24‑pin cable by counting from the left with the clip facing up and pins facing toward you.”
“Make sure you jump the correct pins – the PS_ON bridge can be made by jumping pin 16 to either pin 15 or pin 17 because both are ground pins on the 24-pin ATX connector.”
A failed PSU doesn’t just mean your PC won’t turn on — it can cascade into damage for the very components you want to protect. The three-method approach gives you confidence: start with the paperclip test for a quick check, follow with the multimeter for voltage precision, and use software monitoring to track long-term drift. For the home user building their own PC, the choice is clear: buy a $15 multimeter and test every PSU on arrival, or risk a component failure that costs ten times as much.
youtube.com, youtube.com, nogentech.co.uk, edvaldoguimaraes.com.br, docs.cirkitdesigner.com, assets-global.website-files.com, en.wikipedia.org, imba.missouri.edu
Frequently asked questions
Can a bad power supply damage other PC components?
Yes. A failing PSU can send voltage spikes to the motherboard, GPU, and drives, causing permanent damage. This is why testing before use is critical.
How much does a PSU tester cost?
Dedicated PSU testers cost between $10 and $30 on major e-commerce platforms. Models with LCD displays provide per-rail voltage readouts.
Is it safe to open a power supply unit?
No. Never open the PSU enclosure. Internal capacitors can hold a lethal charge even months after the unit has been unplugged.
What does a clicking noise from my PSU mean?
A clicking noise often indicates failing fan bearings or the PSU’s protection relay engaging repeatedly. Both suggest imminent failure.
How to test the PSU fan?
Use the paperclip test to power the PSU without a motherboard. If the fan doesn’t spin or makes grinding noises, the PSU needs replacement.
Does a PSU need to be grounded for testing?
The PSU connects to ground through the AC cord. During the paperclip test, ensure the AC plug is inserted so the PSU has a proper ground reference.
How often should I replace my PSU?
Replace every 7–10 years for standard use. Earlier if voltage readings drift toward the bottom of ATX tolerance or if the fan becomes noisy.
More related posts
 Autumn Wedding Guest Dresses: What to Wear in 2025-2026 | Ireland Guide
 Is 500mg of Magnesium Too Much – Safe Limits and Risks
 Double Bed Size in CM Ireland: Guide to EU & IKEA Sizes
 Concerts in Dublin This Weekend: Top Gigs & Free Events
 Dunnes Stores Festival Waistcoat: €10 Sale (XS-XL)
 Crowne Plaza Dublin Airport: Shuttle, Parking & Transport
 Flights from Dublin to London Ryanair: Prices, Timetables & Tips
 Glow For It Lash Serum: Reviews, Results & How to Use